Transfer Photos from iPhone and iPad to Windows
In this world of advanced technology, you have lots of options to choose your smartphones and computers/ laptops. A lot of times there is a situation when your phone or tablet is not of the same make as your computer. This results in difficulty to transfer the data from phone/ tablet to the computer. In this article, we will show you how to transfer photos from iPhone to Windows 10 PC . Let’s assume you have an iPhone and a Windows 10 PC. Now you have to transfer photos clicked on an iPhone to the Windows 10 PC.
The easiest way to transfer photos from iPhone to Windows 10 PC is to set up an automatic sync between your iPhone or iPad and your Windows PC. This will help your photos transfer to your computer without doing anything other than open the folder where those photos will be copied. We have shared other solution for iPhone user like iPhone 6/6 Plus Touch Screen Unresponsive, WiFi Not Working in iOS 9 on iPhone, iPhone Activation Errors, Clear “Documents and Data” from iPhone and we try to give best solution.

But if you manually like to import the photos from an iPhone to Windows 10 PC, we will show you some simple methods.
- How to download and install iTunes
- How to transfer iPhone and iPad photos using File Explorer
- How to transfer iPhone and iPad photos using the Windows 10 Photos app
- How to transfer iPhone or iPad photos using iCloud
You will need to install iTunes if you want your PC to recognise the iPhone or iPad in the File Explorer. Let’s see how to do it.
How to download and install iTunes on Windows 10 PC
Apple iTunes connect your iDevice to Windows PC and enables you to transfer photos to Windows 10. If your iPhone Wont Connect to iTunes, we have shared solution.

Step #1: Launch any of the web browsers you use from the Start menu or desktop.
Step #2: Navigate to www.apple.com/itunes/download.
Step #3: If needed Scroll down and Click Download Now.
Step #4: Click Save. iTunes will now download.
Step #5: Click Run when the download is complete. The iTunes installer will open.
Step #6: Click Next.
Step #7: Then click Install after checking the installation options.
Step #8: Click Finish.
How to transfer iPhone and iPad photos using File Explorer
After installing iTunes, you have to follow these steps to transfer the photos using File Explorer.

Step #1: Connect your iPhone or iPad to your windows 10 PC using a proper USB cable.
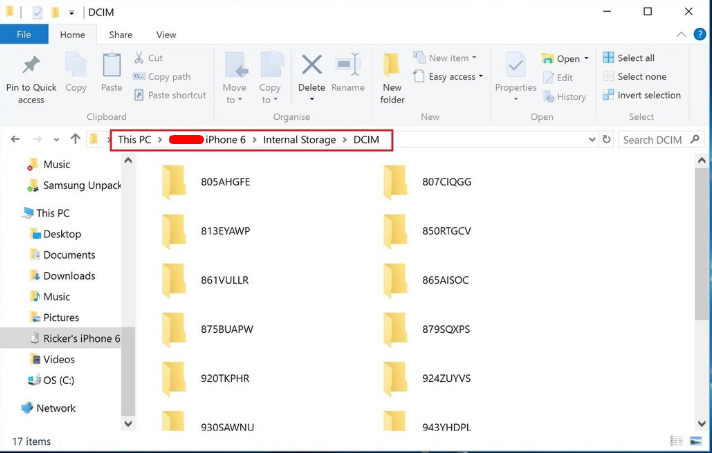
Step #2: Launch Windows Explorer from your desktop, Start menu or taskbar. You can also use the Windows key + E shortcut on your keyboard.
Step #3: Click the arrow ‘>’ next to This PC in the menu on the left side of the window.
Step #4: In This PC sub-menu, Click NAME’s iPhone or NAME’s iPad.
Step #5: Double-click Internal Storage.
Step #6: Then Double-click DCIM.
Step #7: Select a folder containing all the images.
Step #8: Click an image. You can select multiple images by holding Ctrl on your keyboard. You can also hit the Ctrl + A shortcut keys on your keyboard to select all the photos.
Step #9: Click Copy to which is located near the top of the window.
Step #10: Then Click Choose location… to select a location. You can also click the desired folder already listed on the drop-down menu.
Step #11: Otherwise, click a folder where you would like to move the photos.
Step #12: Click Copy.
How to transfer photos from your iPhone or iPad using the Windows 10 Photos app

The Photos app comes pre-installed on Windows 10 PC. This will be very useful in transferring the photos at once.
Step #1: Connect your iPhone or iPad to PC with a proper USB cable.
Step #2: Launch the Photos app from your desktop, Start menu or taskbar.
Step #3: Click Import which is located on the top right of the window.
Step #4: Deselect any photos you would not like to import. They will all be imported by default.
Step #5: Click Continue. Your photos will now be imported into the Photos app.
How to transfer photos from iPhone or iPad to Windows 10 using iCloud

If you have backed up the photos on your iPhone or iPad to iCloud, Windows 10 has the ability to use iCloud to wirelessly sync your photos. Also check : Bypass iCloud Activation Lock in iOS 9
Step #1: Launch the web browser from the Start menu, desktop or taskbar.
Step #2: Navigate to the website to download the iCloud for Windows.
Step #3: Scroll down a bit and Click Download.
Step #4: Click Save.
Step #5: When the download is finished Click Run.
Step #6: Click I accept the terms in the license agreement.
Step #7: Click Install.
Step #8: Click Finish after the installation is over. Your computer will restart. The iCloud window will automatically appear upon restart.
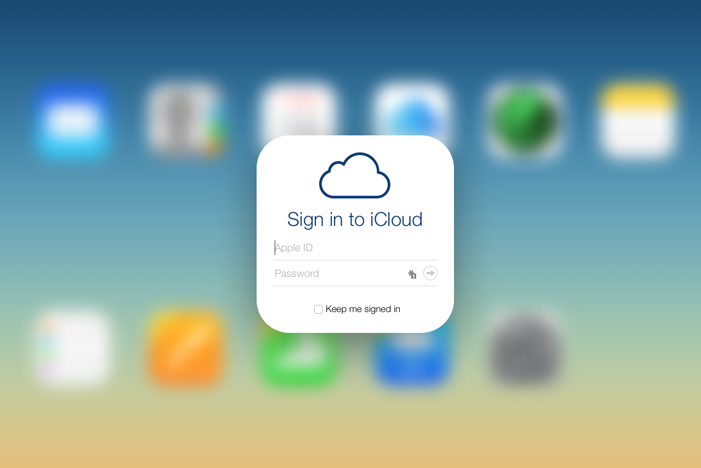
Step #9: Type your Apple ID and password.
Step #10: Click Sign In.
Step #11: A window will appear. Click the Options button next to Photos.
Step #12: Click and checkmark the box next to My Photo Stream.
Step #13: Click the box next to Upload new photos from my PC and deselect it. Set the options as you require ensuring your photos are safely transferred to windows PC.
Step #14: Click Done.
Step #15: Click Apply. All the photos in your iCloud will now download to your PC.
These are the simple methods to transfer photos from iPhone and iPad to Windows PC (7/8/10). Now you can edit the photos on PC or upload to social media or use for whatever reason.
Some other iPhone Solution
