How to use SeekaHost.app to create a WordPress blog? That’s what you’ll learn throughout this guide.
Have 0 website building experience? Doesn’t matter. SeekaHost is beginner-friendly. If you just follow this guide right, you’ll have your WordPress blog in the next few minutes.
And no, you don’t need the fortune to start your own WordPress blog with SeekaHost.app. In fact, SeekaHost.app offers a 100% free 7-day free trial. So in case, things don’t appeal to you, you wouldn’t be losing anything.
Let’s get going then.

Contents
- How to use SeekaHost.app to create a WordPress blog?
- Buying a WordPress hosting on SeekaHost.app free for 7 days?
- Installing WordPress on your SeekaHost.app blog
- Changing nameservers for your WordPress blog
- Enable SSL to improve security and rankings [free]
- Final step! Log into your WordPress blog
- How to use SeekaHost.app to create a WordPress blog?
How to use SeekaHost.app to create a WordPress blog?
If you’re asking this question, you’re clearly very new to websites. So, I’ll take the most basic and simplest possible approach throughout this guide.
In order to create any WordPress blog, the two basic requirements are ;
- A domain: The “link” to your website. E.g. www.microsoft.com (for Microsoft). Going for .com domains is the best. However, SeekaHost.app also allows registering many other extensions. And you can use the domain checker tool to find a good domain name.
- And a hosting: The space on the internet where you will store your website so others can access it.
SeekaHost.app provides both of these.
On top of that, you also need the WordPress CMS. This is free by default and can be installed on any server.
However, SeekaHost.app makes it even simpler. It has this one-click installer that will let you install WordPress in seconds.
Here are the steps to create a WordPress blog using SeekaHost.app:
- Register at SeekaHost.app
- Buy a domain
- Buy a WordPress hosting server (7-day free trial).
- Install WordPress
- Change your nameservers
- Enable SSL
- Login to your WordPress website.
All of this shouldn’t take more than 10 minutes at best. Let’s get started then.
Register at SeekaHost.app
You simply go to their registration page, and sign up.
All you need is an e-mail ID and a password.
Once you’ve signed up, verify your account by clicking on the verification link you get in the e-mail.
The reason I’m not attaching screenshots is I’m confident you know how to do this. You’ve been verifying accounts since the day you started on the internet, haven’t you?
Buy a domain
The domain is one of the most important parts of your WordPress blog, Here’s why:
- It’s your “brand name”.
- This is how people find you.
- More importantly, the keywords in your domain also affect your site’s SEO.
So, make sure the domain you purchase reflects your brand as precisely as possible. E.g. “bamboopickleaustralia.com is great for someone selling Bamboo pickle in Australia.
Obviously, you can go the other way round by making it something completely unrelated. E.g. “Apple.com” for a company selling technology! It just may not always work, especially in terms of SEO.
Anyway, let’s register your domain?
Step #1>
SeekaHost has a panel on the left-sidebar. This can be used to access all its services. You should see “Domains” . When you click on “Domains”, a few new options will popup, simply select “register domain”.

Step #2>
Search for the domain you wish to purchase using the search-bar. If it’s available, you can add it to cart.

Step #3>
Click on “checkout” on the popup that shows next.

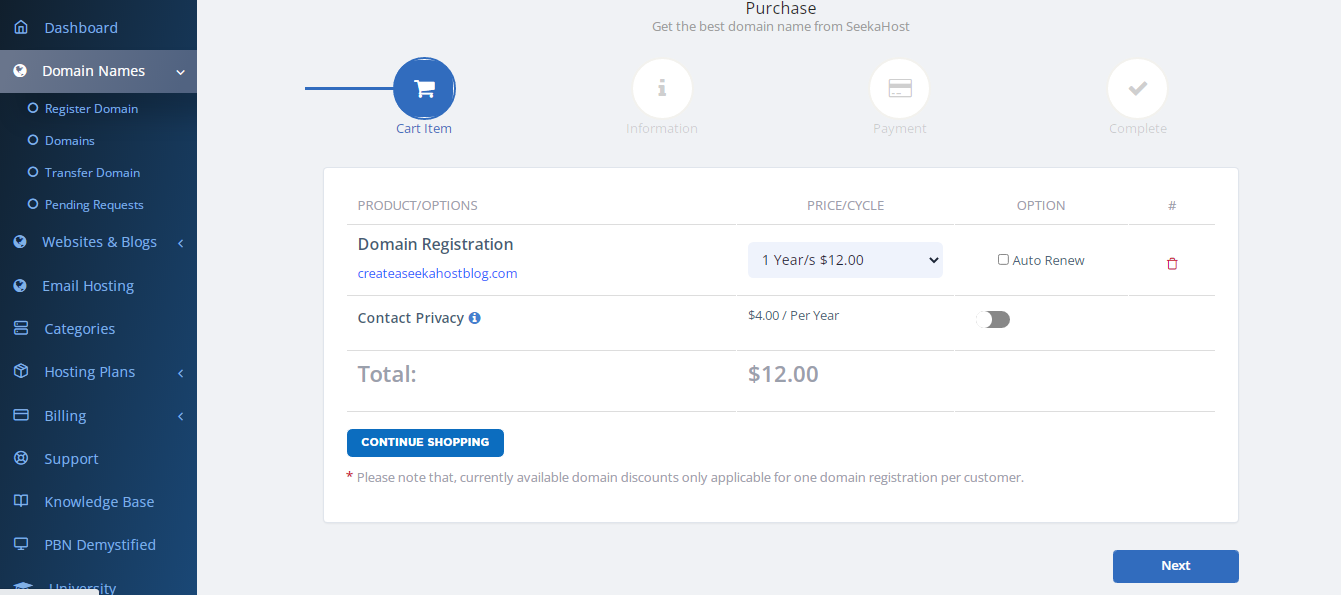
Step #4>
On the next page, just click next.
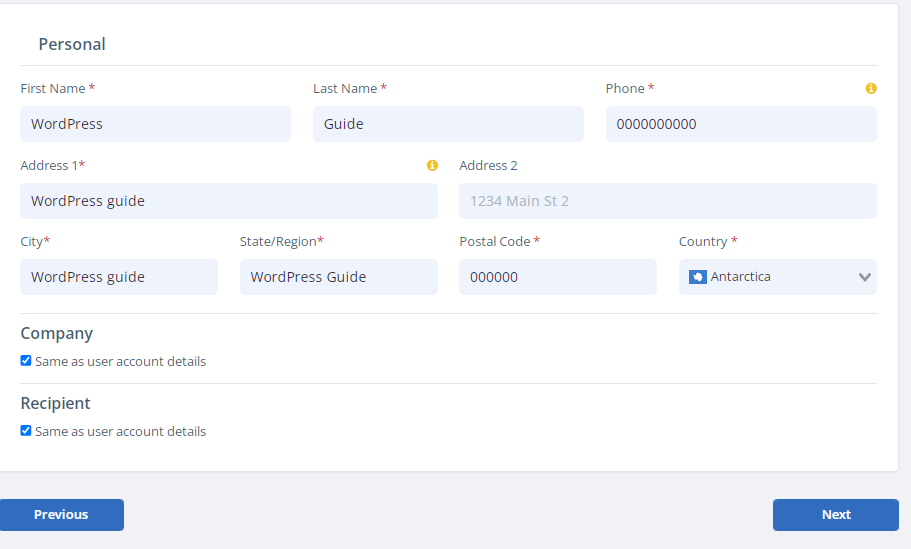
Step #5>
Enter the details it asks for.
Step #6>
This last page is self-explanatory. You just make your payment. Choose how you wish to pay (card/PayPal) and you can pay for your domain.

Let’s get you WordPress hosting next.
Buying a WordPress hosting on SeekaHost.app free for 7 days?
I hope you’re already logged in to your SeekaHost.app account. If yes, follow these steps to get yourself WordPress hosting for free.
Step #1>
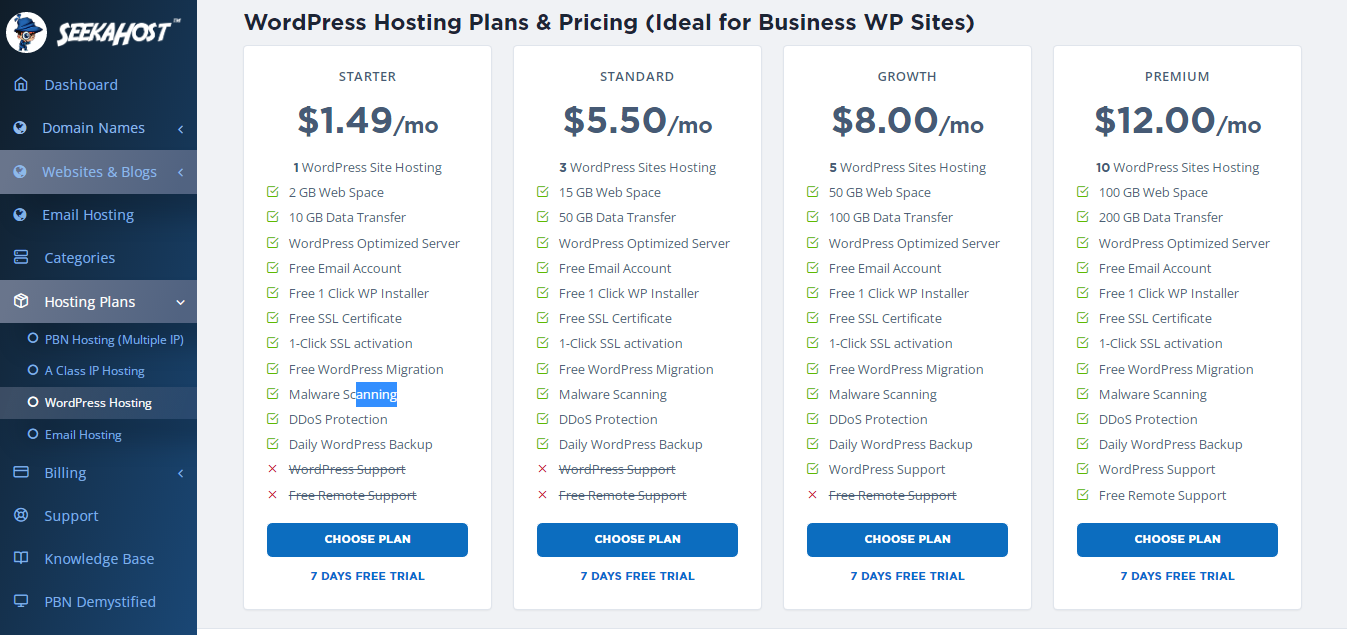
Click on the “Hosting Plans” option. This would show you some new options, click on “WordPress Sites”. These are SeekaHost’s WordPress specialized servers

Step #2>
Now you’d see 4 plans to choose from. Pay attention to the “number of websites” each plan offers. This is the only massive difference between the plans.
Choose the plan depending on the number of WordPress blogs you wish to create.
Do not click on the “Choose plan” button. Rather, click on the “7 day free trial” link. This ensures that your card/PayPal account isn’t charged.
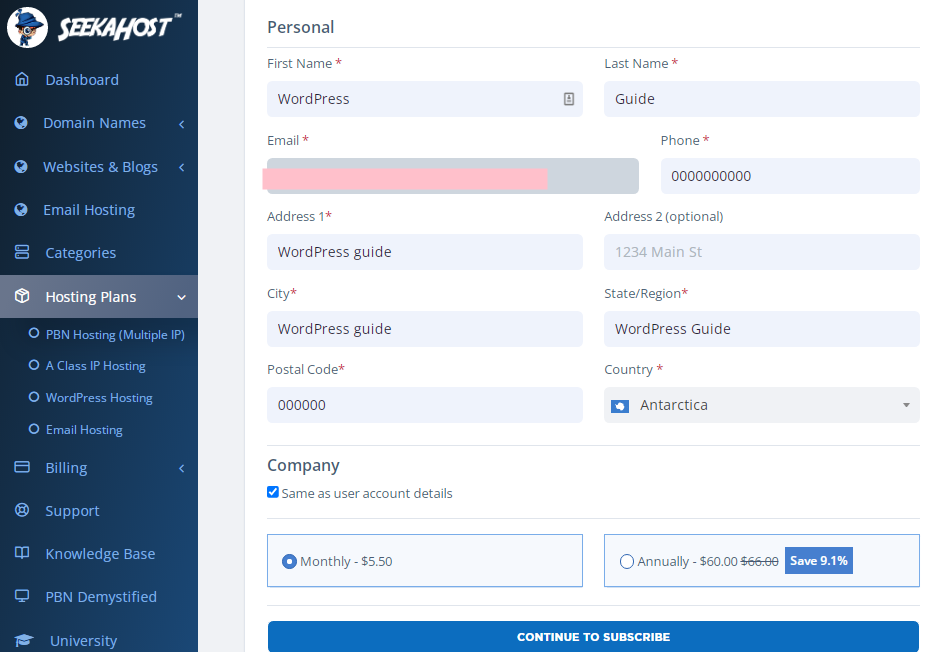
Step #3>
Enter the information that’s asked for.
Step #4>
Lastly, make your payment just like you did for the domain.
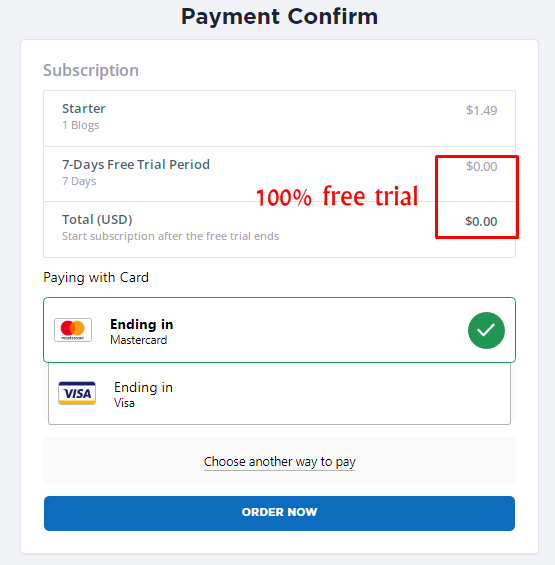
We now need to install WordPress on this server that you’ve just got.
Installing WordPress on your SeekaHost.app blog
If you asked how to create a WordPress blog, you’re probably getting excited now, aren’t you? You should. It’s very easy installing WordPress and then you’ll be all set.
Step #1>
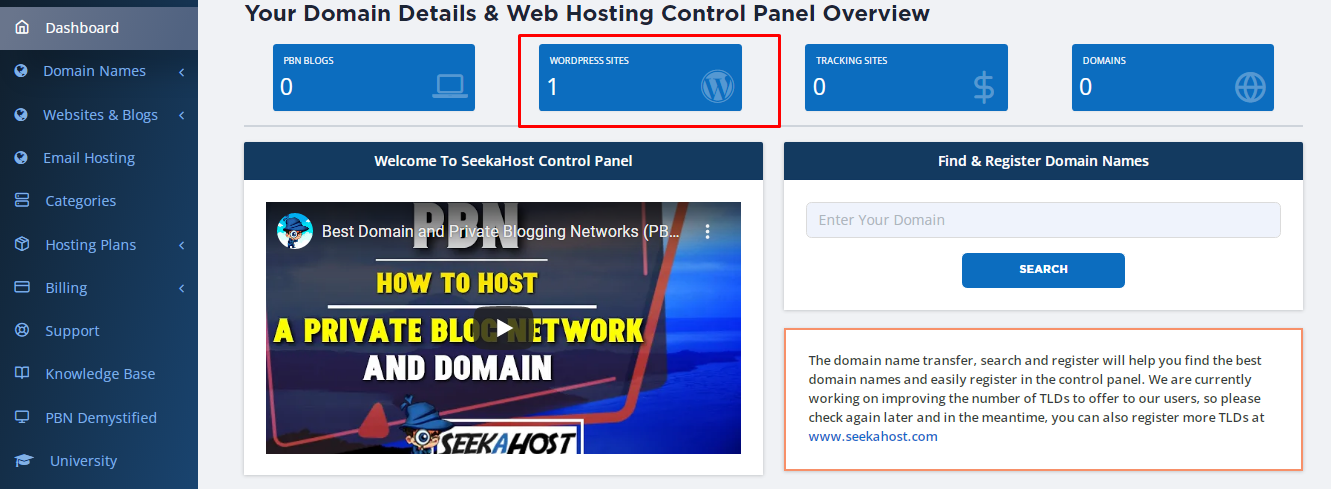
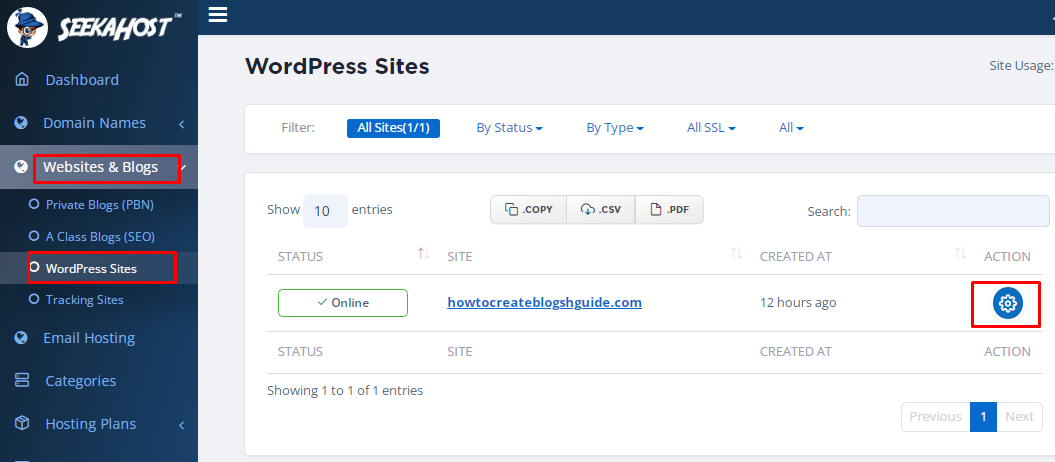
Go to your WordPress site dashboard. All you have to do is click on the “WordPress sites” tab on your dashboard.
Step #2>
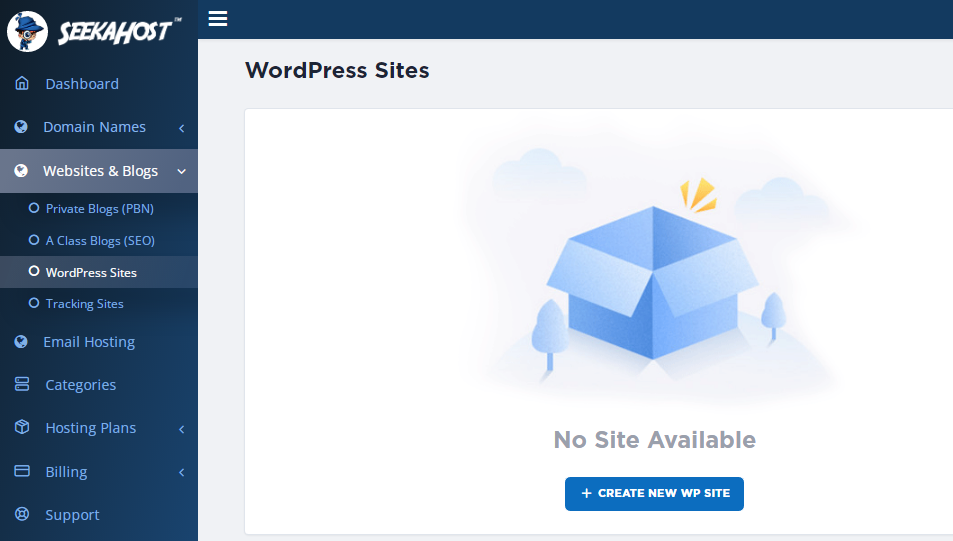
Click on the “Create new WP site” button..
Step #3>
Enter the domain you purchased in the “WordPress site domain” field. Enter your website’s name in the “Blog Title” field.
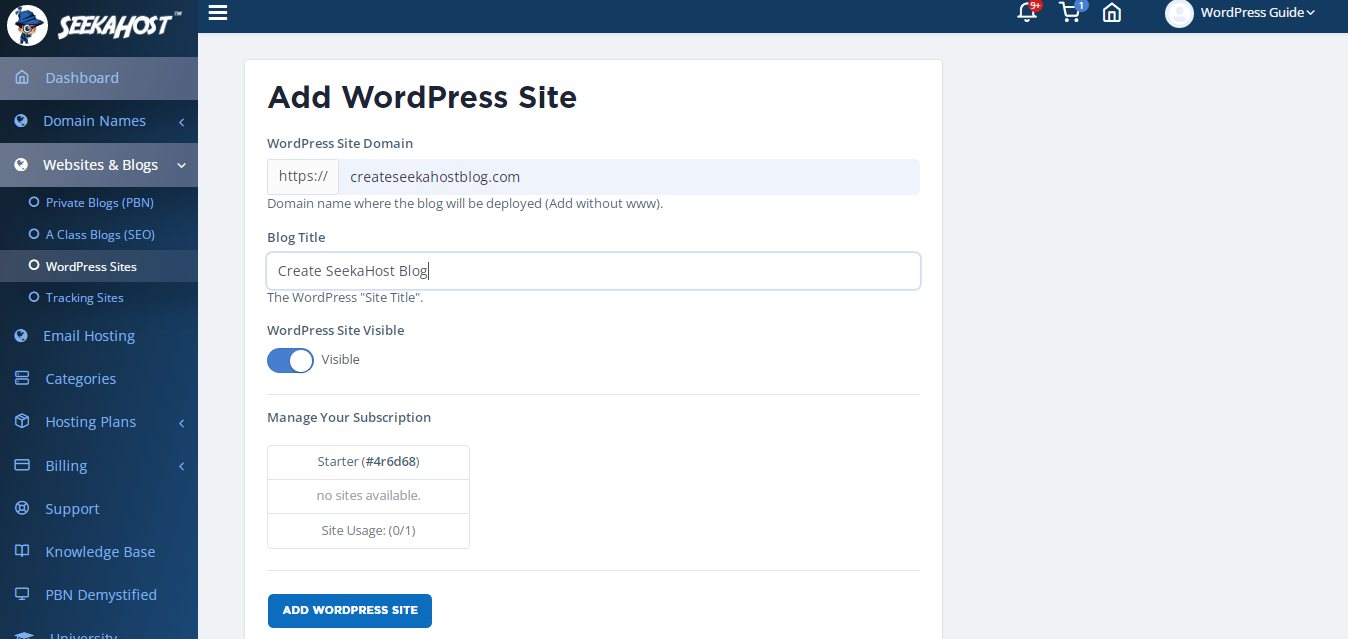
Your blog is now created. We now need to configure the nameservers.
Changing nameservers for your WordPress blog
If you’re following this guide to the letter, you should already be on your “WordPress sites” page. This page lists all the sites you’ve got hosted on SeekaHost.app.
Just in case you aren’t, you can reach the page just by clicking on the “WordPress sites” tab on your SeekaHost.app dashboard.

Here’s how you change your nameservers.
Step #1>
Click on the blue gear icon that you see.
![]()
Step #2>
Copy your “nameserver 1” and “nameserver 2”.
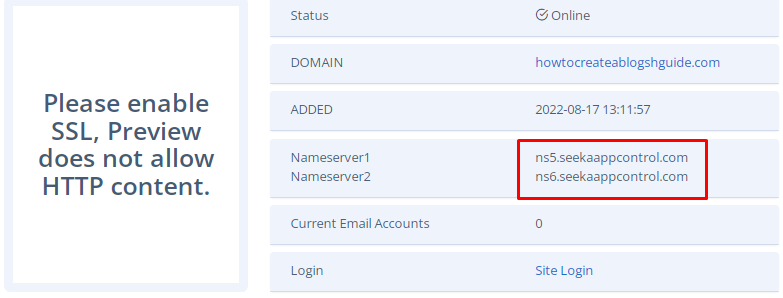
Step #3>
Go to the “Domain names” primary tab. Then choose the “Domains” secondary tab. This should show you all the domains you own.
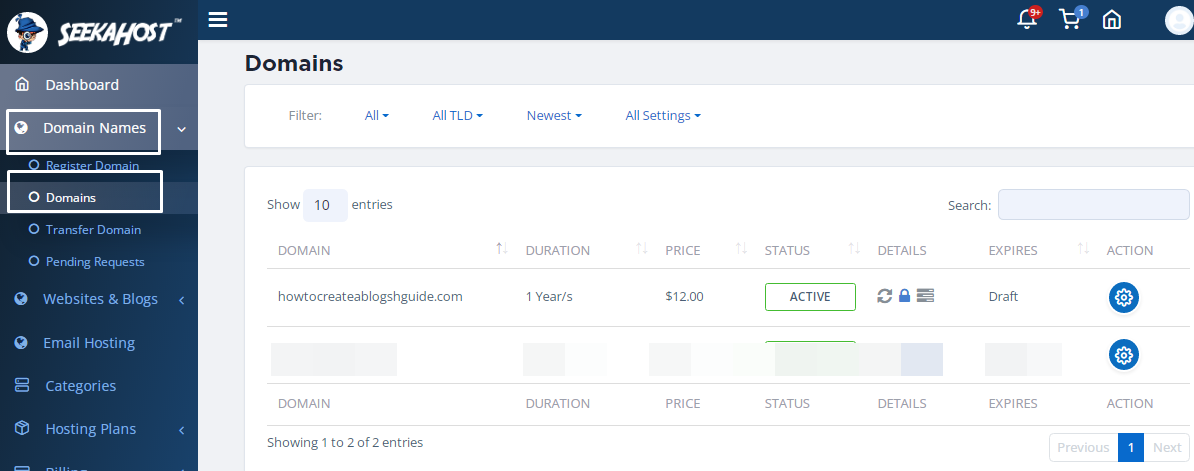
Step #4>
Click on the blue gear icon.
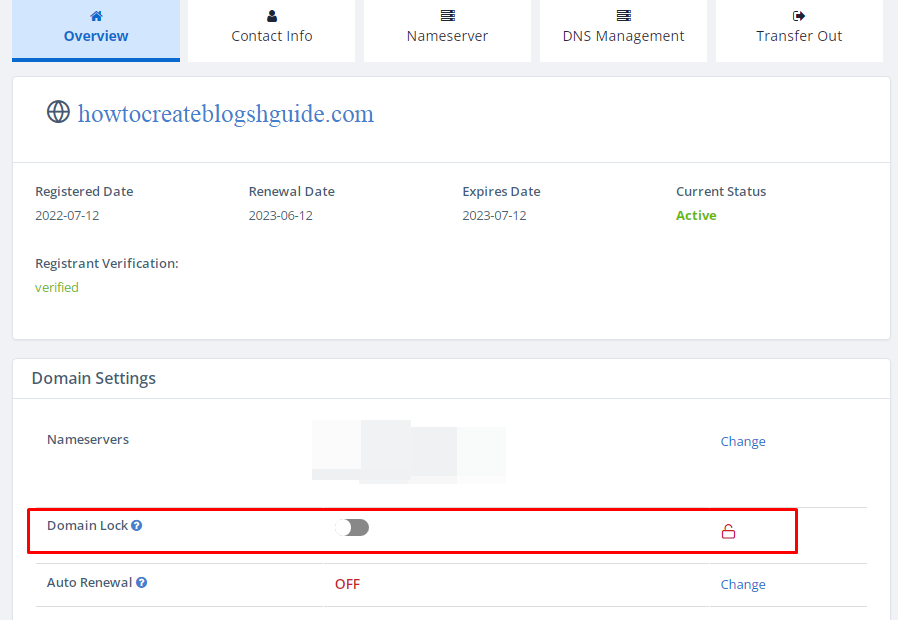
Step #5>
Under the “Domain Settings” section, unlock your domain. Simply click on the “Domain lock” slider and it should change from blue to grey.
Step #6
Look up, you should see the “Nameservers” tab. Paste the nameservers you copied in the “custom/private nameservers” fields.
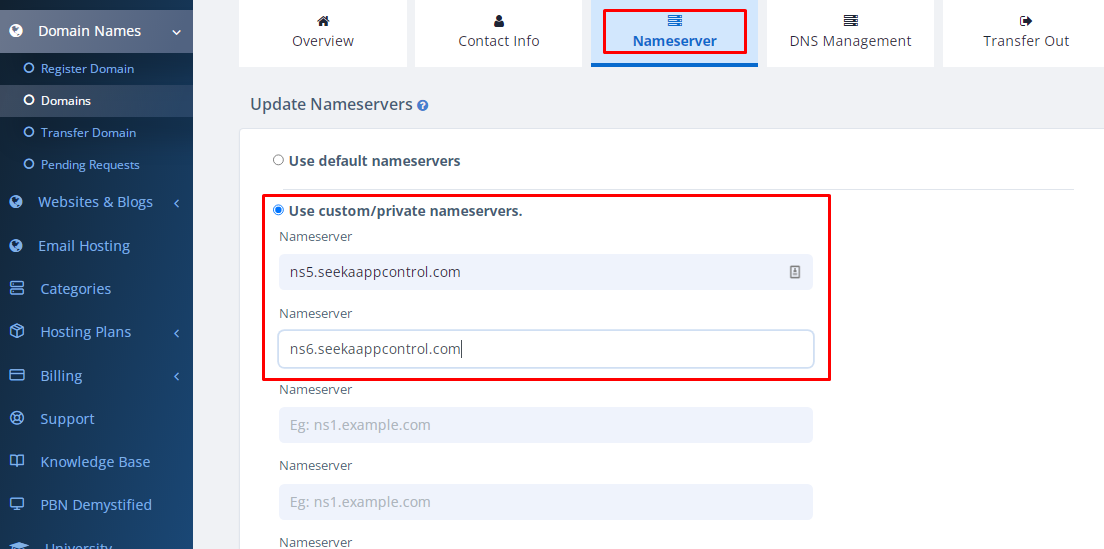
Scroll down and click on “change nameservers” to save your new nameservers.
You’re almost done. Your website is functional now. However, let’s get through one more technicality before you can start using it.
Enable SSL to improve security and rankings [free]
SSL certificates are advanced security certificates that you need to install on your server. Sounds complicated, right?
In reality, thanks to SeekaHost’s extremely easy interface, you only need a single click to enable SSL certificates.
A lot happens in the background, sure. However, on your part, the click is all you need.
Step #1>
Go to your WordPress hosting panel.
Step #2>
Click on the “SSL” button. This would take you to your SSL page. Click “”enable SSL”. (The button should be initially grey, and should turn to blue when you click on it).

You just activated SSL on your WordPress blog.
Final step! Log into your WordPress blog
So, you’ve taken care of all the technicalities. Your hardwork pays now!
In order to login to your WordPress blog, you’ll need to core elements:
- The WordPress site’s login URL.
- Your username & password.
Your website’s login URL can be found on the same page where you found your nameservers. (Websites & Blogs > WordPress Sites > gear icon). Just under the nameservers, you’ll see a “site login” link. Clicking this takes you to your site’s login page.
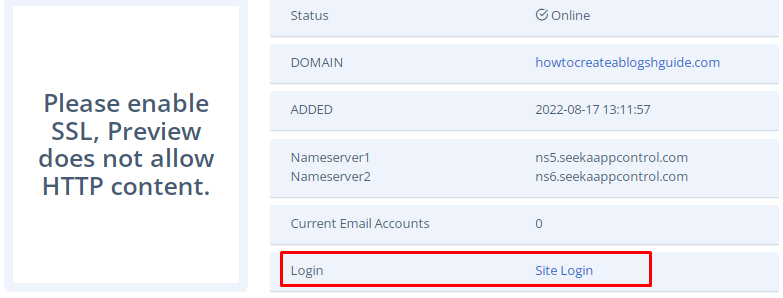
As for the username and password, these can be found in your e-mail. SeekaHost sends you an e-mail as soon as your blog was installed. That e-mail contains your username and password.
Just go to the “site login” link, and paste your username and password. You should be in your WordPress blog!
How to use SeekaHost.app to create a WordPress blog?
That’s how you use SeekaHost.app to create a WordPress blog. If you ask me, the steps couldn’t be any simpler.
Even without this guide, if you simply log into SeekaHost, you can figure most of it out.
Once you login to your WordPress blog, you can add new posts, change the layout, or do anything else you want to do.
With SeekaHost, you also get free migration as well as anti-DDoS protection! The 7-day free trial makes things even better, doesn’t it?
Go create your WordPress blog then. If you get stuck, just drop a ticket using the “support” tab on your SeekaHost dashboard.
Recommended:
