Getting started with a new WordPress website is exciting. After a long process of choosing a unique domain name and reliable WordPress hosting, it’s finally time to get the site running
From publishing new content to customizing the site appearance, installing new plugins, and conducting website optimization, site owners can do it all from the WordPress dashboard in a few easy steps.
However, all of these processes often result in a cluttered admin area. For example, some third-party extensions come with update alerts which can be counterproductive for many website owners.
This short guide will cover five tips on how to organize the WordPress dashboard for efficiency.
Contents
WordPress Dashboard
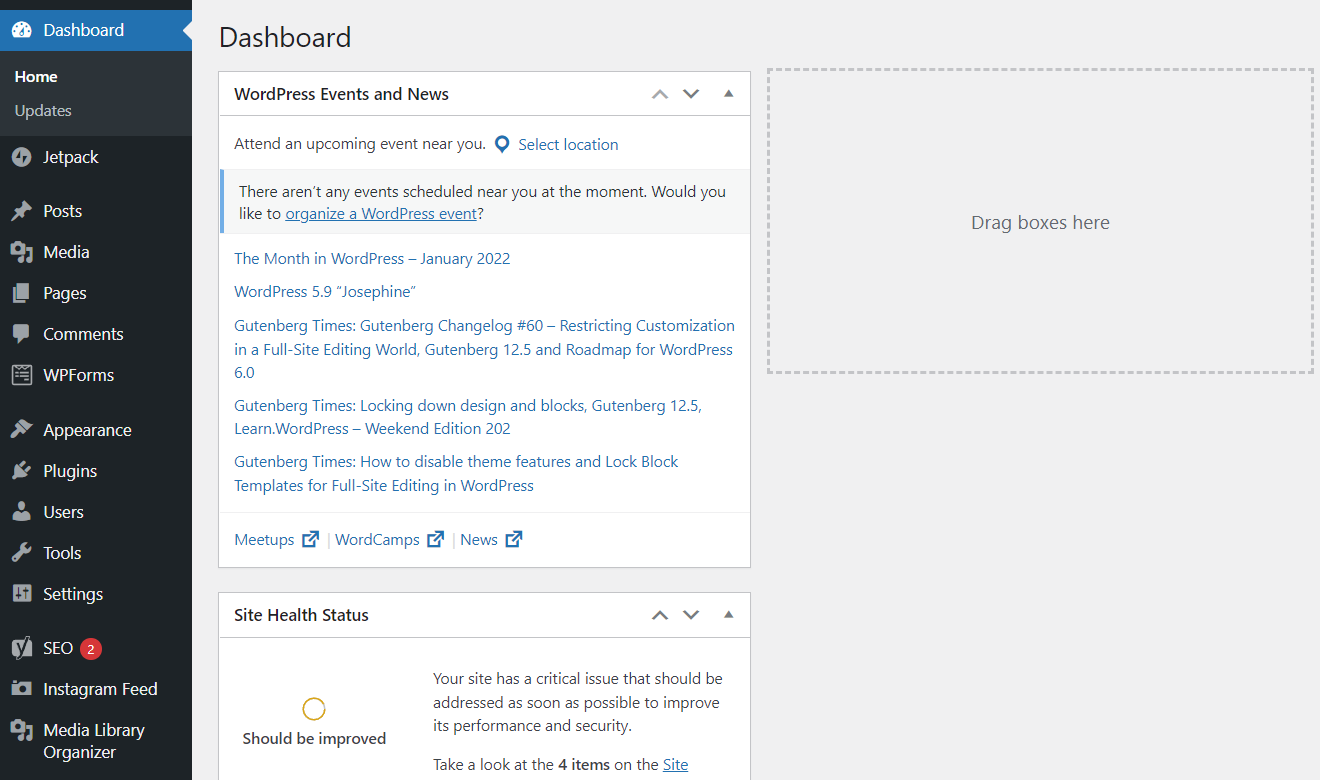
The WordPress dashboard features the overall WordPress site stats, including published posts, software updates, and site health information. It also contains the Quick Draft section, making it easy for bloggers to write down their ideas quickly.
However, some of the elements can be irrelevant for many website owners. For that, let’s look at three handy tips to rearrange the WordPress admin dashboard.
Use the Up and Down Buttons
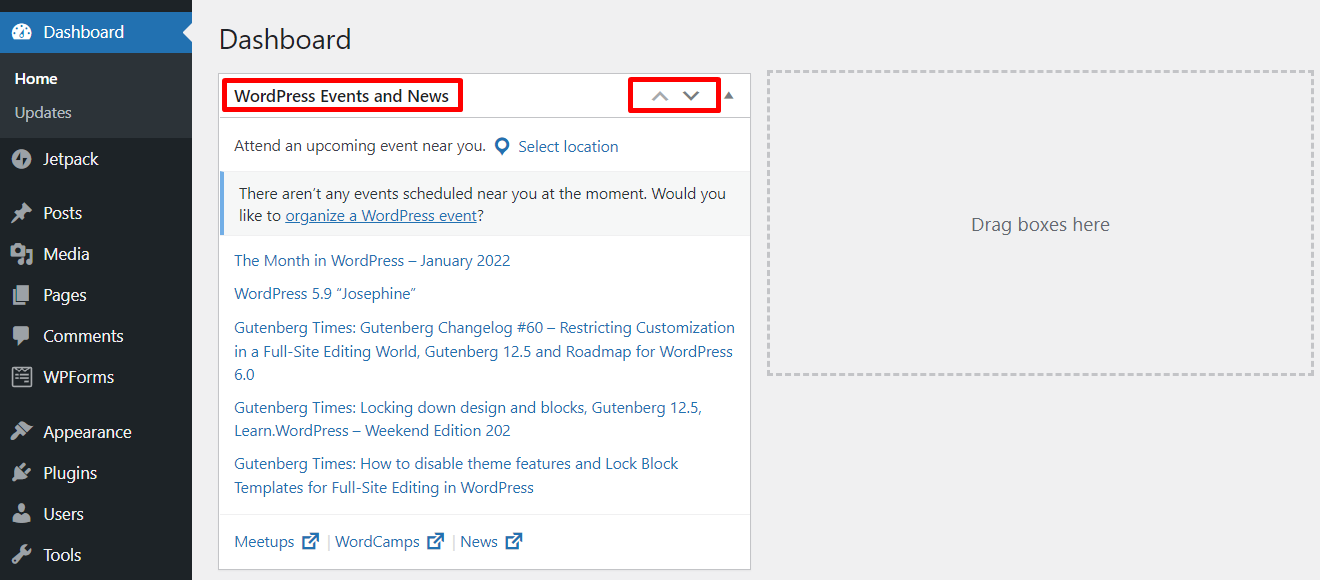
The up and down buttons help site owners organize the dashboard based on their needs and priorities.
Use these buttons to move WordPress Events and News down if you don’t use it that much and make the Quick Draft part the first thing you see if you find it useful, like so:

Utilize the Drag and Drop Feature
WordPress uses a drag-and-drop interface, and it actually encourages users to try it by providing the Drag boxes here instruction.
Drag and drop your favorite box next to Quick Draft for easy access. For example, we have moved the At a Glance section here:

Go to Screen Options
This feature enables users to include and exclude menu items.
On the top-right corner of the WordPress admin dashboard, click Screen Options. It will expand to reveal the Screen elements menu where site owners can choose the elements they want to see on their dashboard.

Admin Menu
The WordPress admin menu is located on the left side of the screen. It’s where users can make changes to their WordPress websites, including adding and publishing a new post, organizing media files, managing comments, and customizing the site’s appearance.
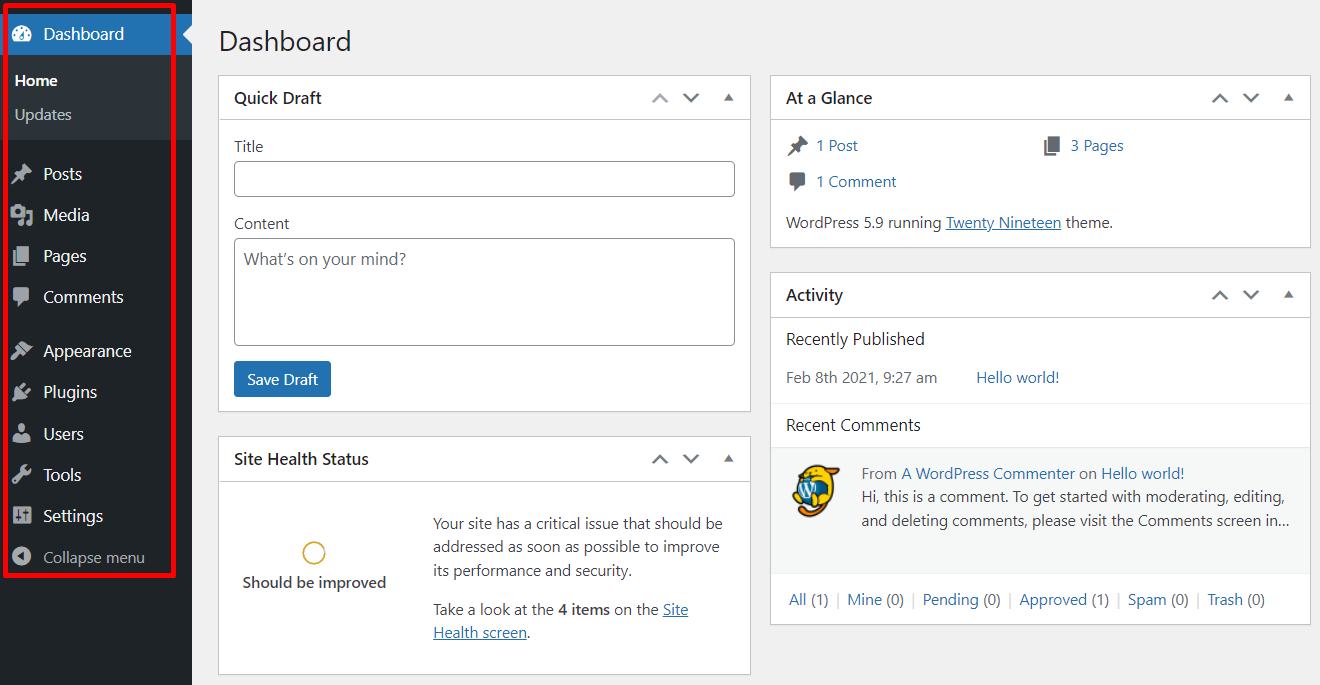
The WordPress admin menu also features the Plugin section where users can install third-party extensions.
Unfortunately, it can become disorganized as site owners install more plugins.
After activation, a plugin may add a menu item that typically appears at the bottom of the admin menu panel, right after Settings. However, some may pop up among the navigation menus, making the sidebar less intuitive.
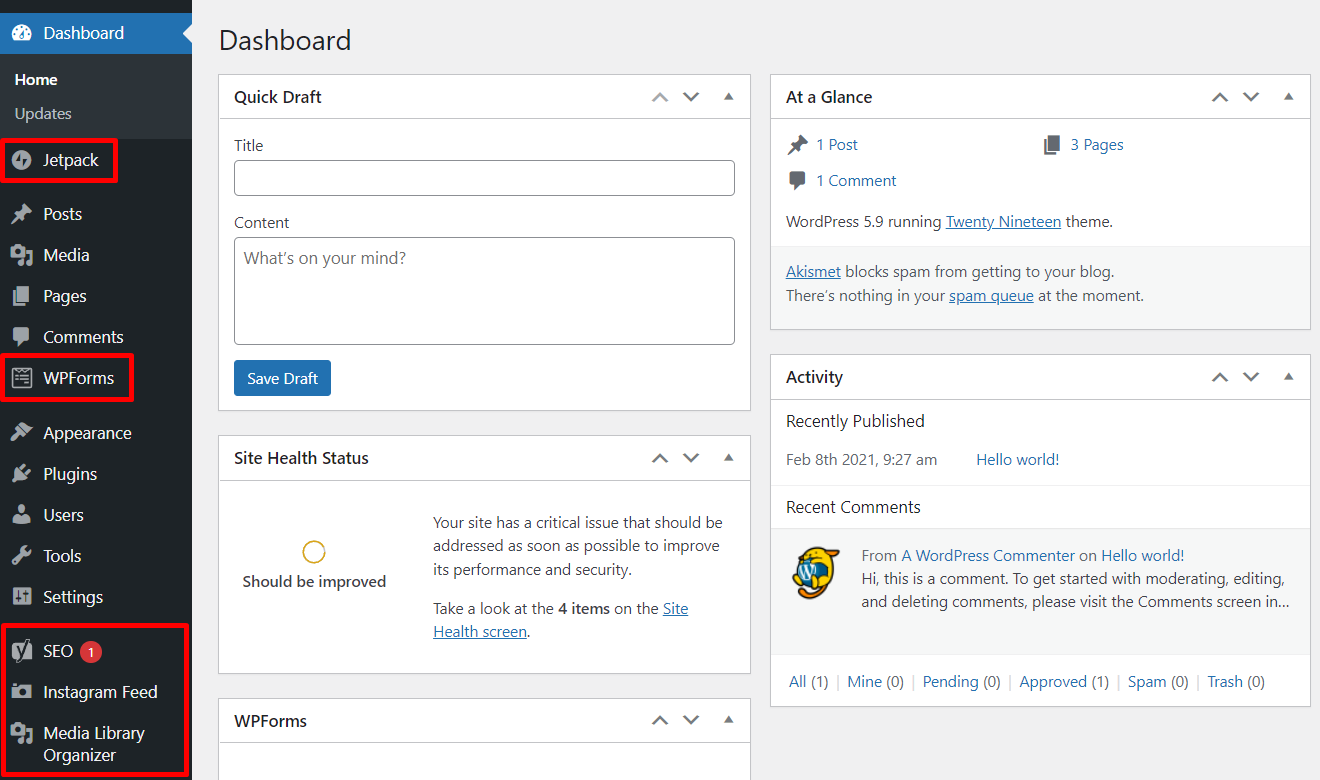
The Admin Menu Editor plugin lets users customize the admin menu with ease. Once activated, it can be accessed by going to Settings -> Menu Editor.

Here’s what the Admin Menu Editor panel looks like:
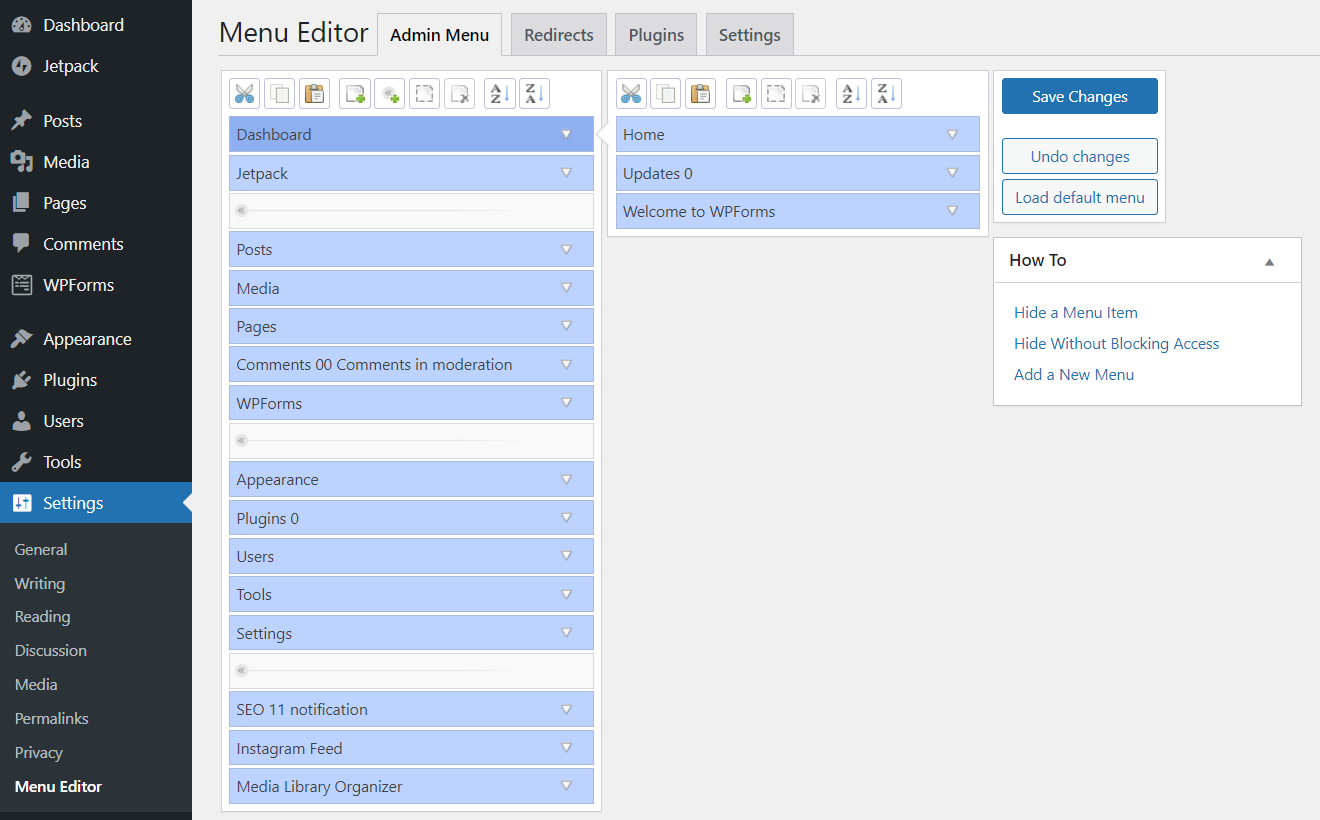
The Menu Editor panel contains the same list of items as the WP admin panel. The difference is that site owners can move the elements around.
This plugin also enables users to:
- Add custom menu items.
- Make submenus.
- Edit menu titles and links.
- Create page separators.
- Hide menu items.
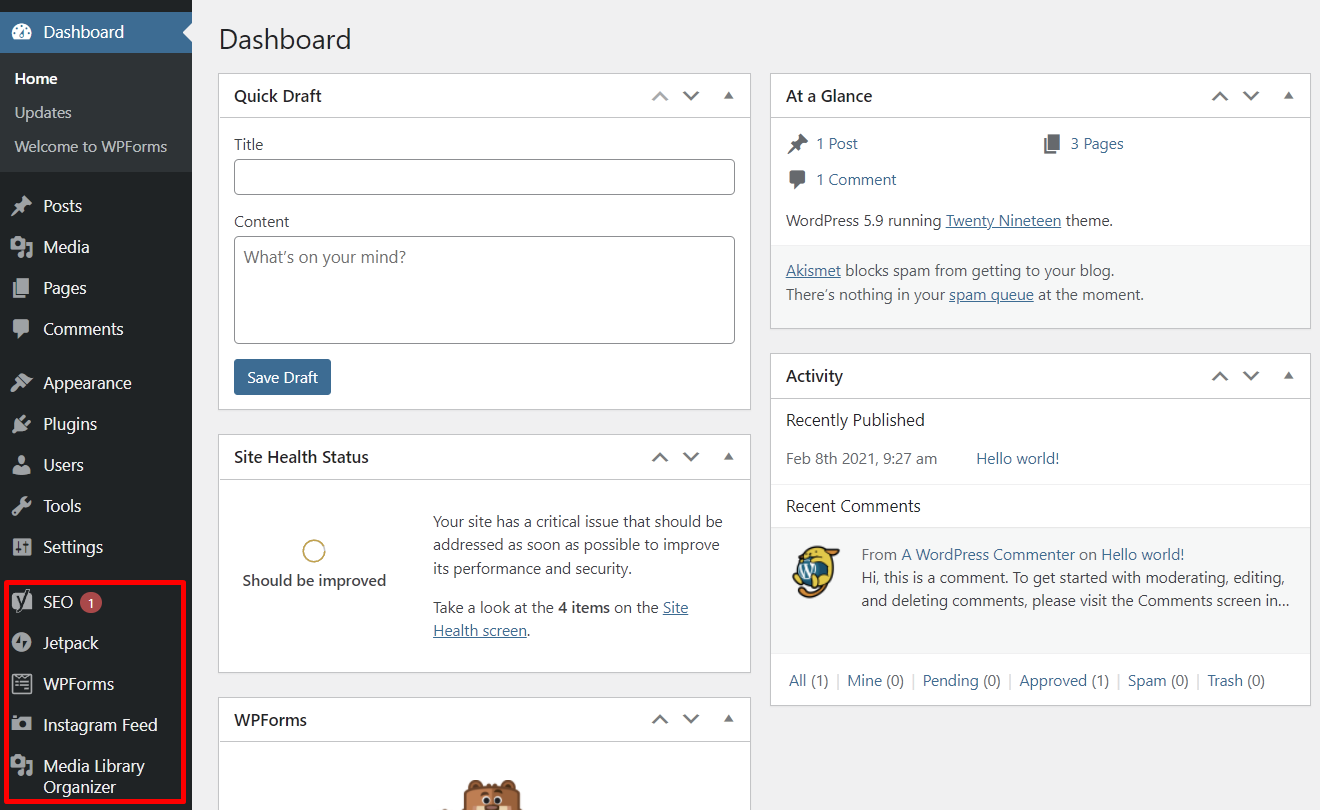
Let’s say you want to group your plugins under Settings. All you have to do is drag and drop Jetpack and WPForms down, like so:
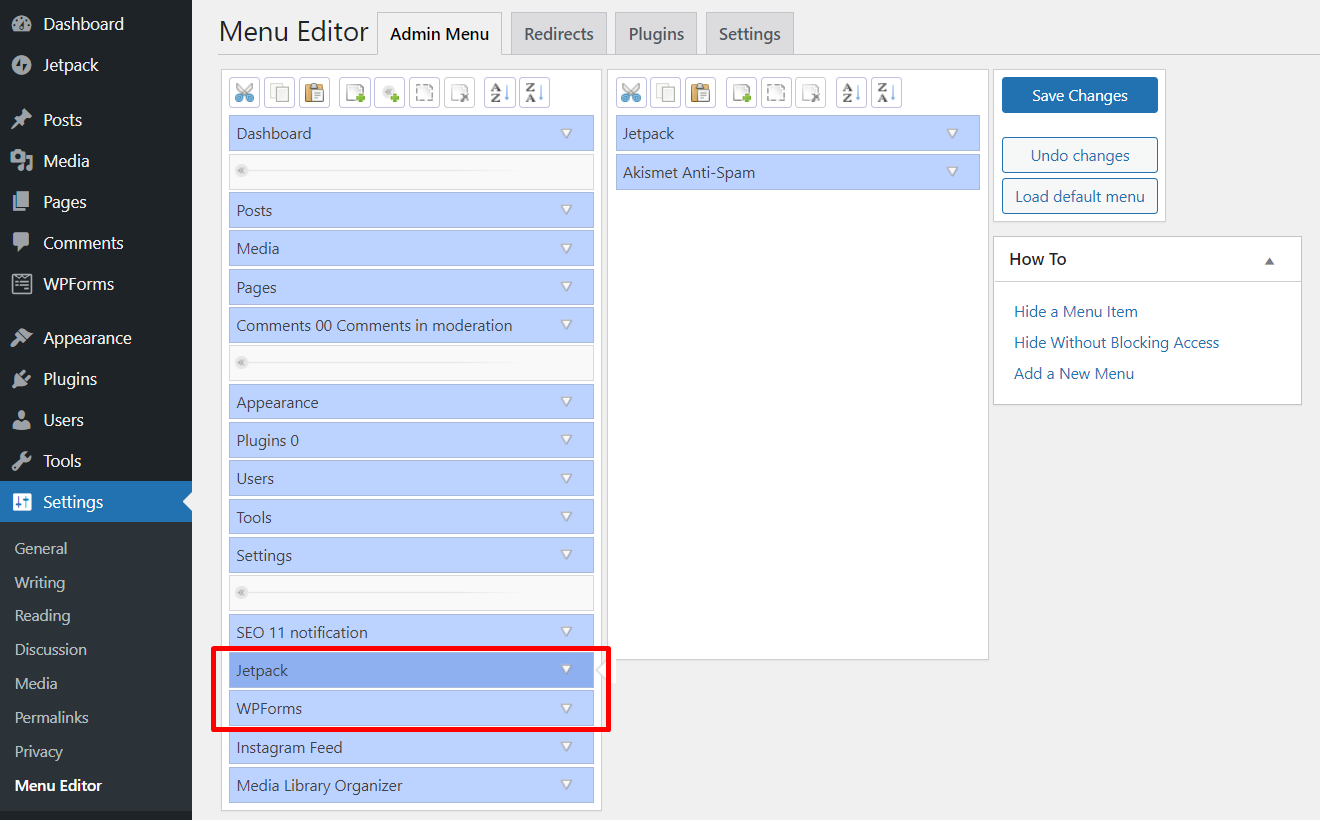
Click Save Changes once you’re done customizing.
Toolbar
The WordPress toolbar is located at the top part of the WP admin area. By default, it only allows three actions to be performed: visit the WordPress website, manage comments, and add new content.
As site owners install plugins, they may notice that some of the apps create shortcuts on the toolbar.

Upgrading the Admin Menu Editor plugin will help solve this problem. The premium version has the Toolbar Editor feature which lets users hide unnecessary shortcuts in just a few clicks.
Additionally, the feature also enables users to create a custom menu item. If you want quick access to all of your plugins, set up a Plugins section on your toolbar and put your shortcuts there.
Page Hierarchy
If you’re still unsure about how the current admin menu looks, try to introduce page hierarchy to it.
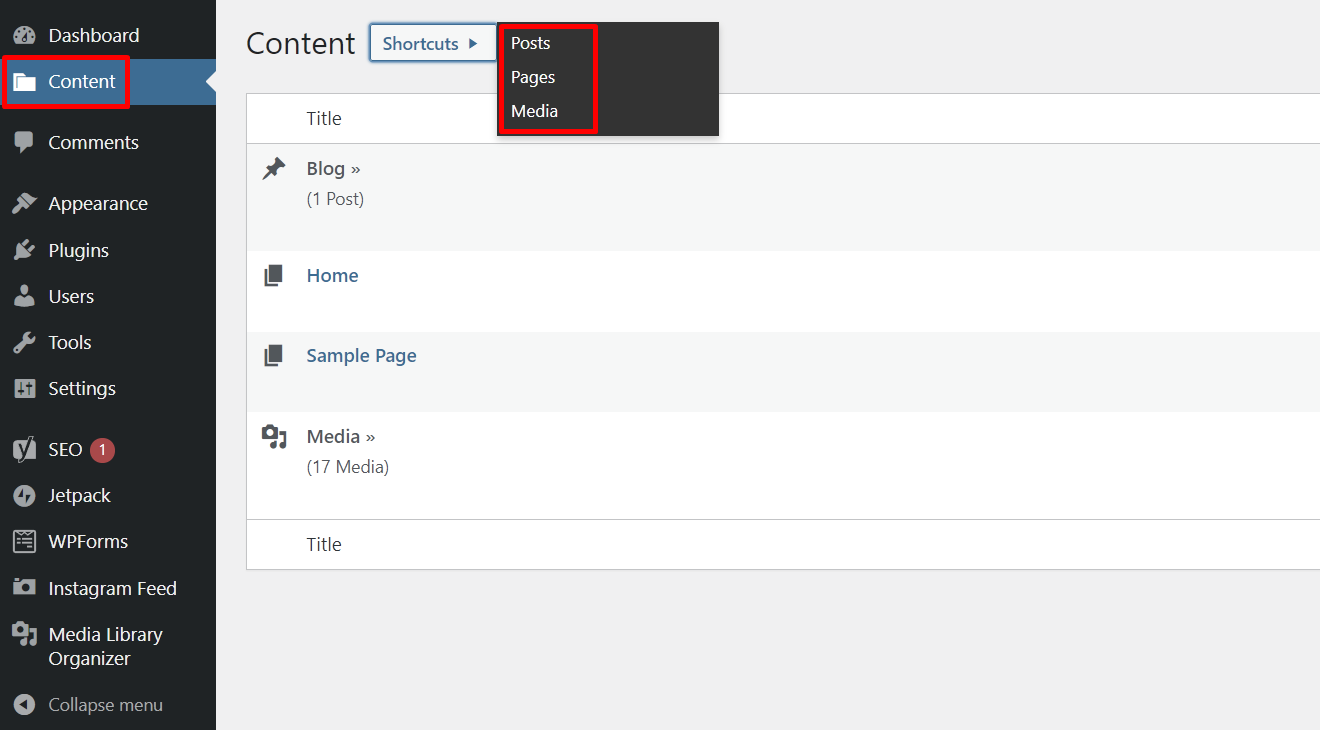
Page hierarchy helps organize the items on the admin menu into a single entry. For example, users can group the Posts, Media, and Pages sections under the Content category.
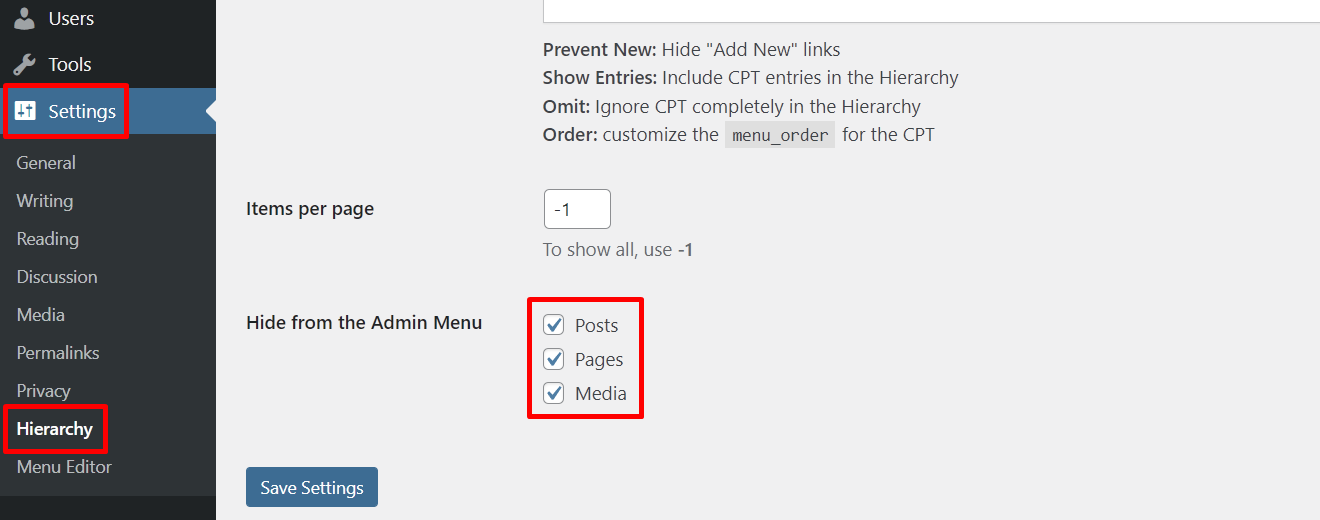
Hierarchy is a handy plugin that can make the categorizing process effortless. Once activated, users will see a Content folder in their admin area.

From the dashboard, simply head to Settings -> Hierarchy to put the Posts, Media, and Pages sections in the Content folder. Tick the three boxes to the left of the menu elements and click Save Settings.
Here’s the final result:
Categories and Tags
Categories let website owners group their content into types, such as Tutorial, Glossary, and Comparison. Alternatively, they can categorize their posts by topic, like Marketing, Technology, and Lifestyle.
Tags enable site owners to label their content pieces with keywords. For example, a blog post in the Marketing category may have SEO, inbound marketing, and on-page SEO tags.
Categories and tags are helpful not only for visitors but also for the site’s backend. Whenever site owners need to review their pieces or create a content silo, these two elements can simplify the process.
Conclusion
If you’ve been using WordPress for a long time, you may have installed a number of plugins and cluttered up your admin area. Luckily, there are solutions to clear it up.
Here are the five tips for a more efficient WordPress admin area you’ve learned in this article:
- Organize the WP dashboard. Site owners can choose which screen elements to display based on their needs.
- Rearrange the sidebar. Group menu items based on functions.
- Manage the WP toolbar. Clear out unnecessary shortcuts.
- Utilize Hierarchy. The plugin enables site owners to put the Posts, Media, and Pages sections into the Content folder.
- Categorize and tag each post. It helps organize content pieces based on topics.
We hope this article helps you tidy up your WordPress admin area. If you have any other tips, don’t hesitate to share them with us in the comments. Good luck!
