It can be intimidating to install Windows on Mac hardware that has been designed with macOS in mind. Running Windows on Mac will allow you to enjoy your favorite games and applications that don’t have a macOS counterpart. You also don’t have to spend extra money on a Windows laptop or desktop for niche tasks, as you can get the entire Windows experience on your Mac hardware.
Before you can get started with installing Windows on your Mac hardware, you’ll need to consider a few things. First, you will need to know the version of the processor inside your Mac device. Generally, Mac’s have shipped with Intel processors in the older models, and the latest ones are equipped with M1 processors designed by Apple.
The processor inside your Mac determines the specific method that you can use to install windows on it. M1 processors are built on a different architecture as compared to Intel ones, and hence the same version of Windows cannot be installed on both. In this article, we will cover methods that you can use for both types of Mac devices, starting with Intel-equipped Macs.
Recommended: How to Install QuickTime on Windows 10
Installing Windows on Intel-based Mac Devices: Bootcamp Method
You’ll need to check a few compatibility prerequisites before continuing with this method. Make sure your device meets the following requirements before proceeding:
- Mac device manufactured after 2007 or later with Intel processors.
- Software updated to at least macOS Catalina or higher.
- At least 55 GB of free storage
- Downloaded ISO of the version of Windows you plan to install.
The installation of Windows on Intel-based Macs is facilitated by an app called Bootcamp. This app is in-built in macOS and allows the user to create a separate partition with Windows installed on the same storage as macOS. Take a look at the detailed steps to complete the installation of Windows using Bootcamp.
Step #1: On your Mac device locate the menu bar, and navigate to “Utilities”.
Step #2: Find “Bootcamp Assistant” from the listing, and run it.
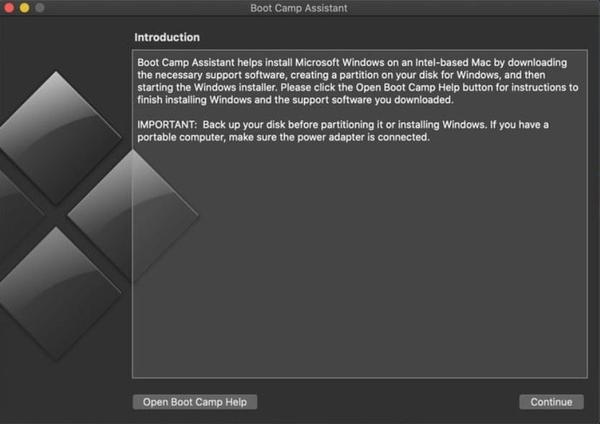
Step #3: On the first run, the app will brief you about how it works.
Step #4: Select ‘Next’ to get the option to choose an ISO.
Step #5: In this section, you need to browse and select the Windows ISO downloaded earlier.
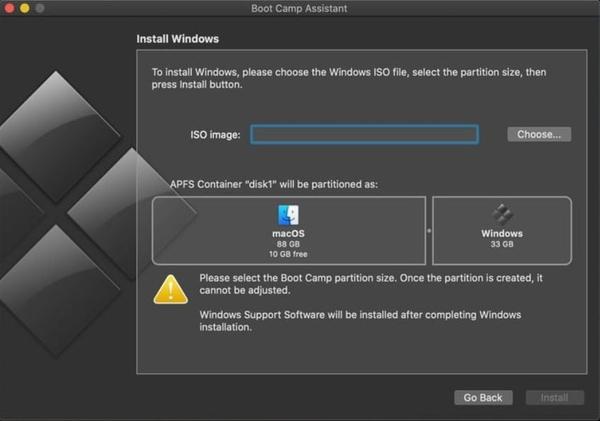
Step #6: After this, you will be prompted to select the partition size that you want to allocate for Windows. Setting this lower than 64 GB can lead to problems in the future.
Step #7: Click on the ‘Install’ button to initiate the setup and disk allocation process.
Step #8: At some point during the installation, you may be required to input your administrator password to continue.
Step #9: After a reboot, you will be presented with the Windows Setup screen.
Step #10: Here, you’ll need to select the partition where Windows gets installed. Select the “Boot Camp” partition to continue with the process.
Step #11: You’ll also need to enter the activation key for Windows at this stage if you have one.
Step #12: Once the setup completes, you will be presented with the option to boot into either macOS or Windows at the time of booting. Reboot into Windows for now to complete the process.
Step #13: Bootcamp assistant should install the most relevant drivers automatically at the time of installation, and you can start using Windows easily once all the initialization is complete.
Installing Windows on M1 or Intel-based Mac Devices: Virtualization Method
If you’re the owner of an M1-based Mac, you will find that the Bootcamp assistant is not present under the utilities section of your device. The M1 chips are based on Advanced RISC Machine (ARM) architecture, and cannot run the full x86 version of Windows. However, the ARM version of Windows can be easily loaded up in a virtual machine and used to its full potential.
The ARM version of Windows also comes with an in-built x86 emulation instruction, and hence you don’t have to worry about the conventional Windows apps not working with it. But there are a few games that may be incompatible with the ARM version.
You have the option of setting up either “Parallels” or “VMWare Workstation” as a virtualization solution. In this article, we’ll be using Parallels to elaborate on the method of installation, as it is cheaper and more user-friendly in general. With this in mind, let’s start with the process of setting up a virtual machine in macOS, and install Windows on it.
Step #1: Visit the Parallels webpage and download the latest version.
Step #2: Next, you need the ARM version of Windows that is only available to insiders. You will need a Microsoft account with insider access while trying to download from the link mentioned here.
Step #3: There are a few permissions that Parallels will require on its first boot to access your storage and other device metrics.
Step #4: You will be notified by parallels that it supports only the ARM version of Windows if you have an M1 chipset.
Step #5: On the next screen, you will need to choose “Install Windows or another OS from DVD or image file”
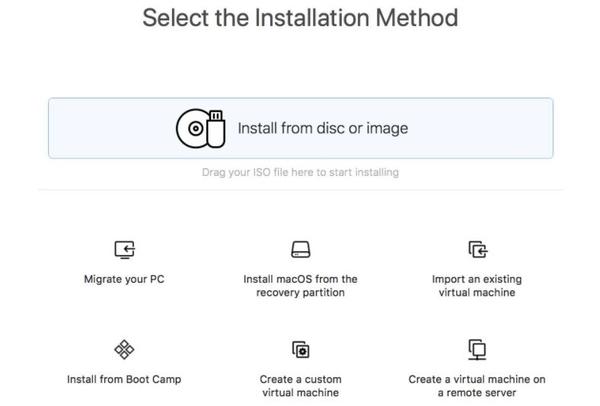
Step #6: Choose the ARM VHDX Windows ISO downloaded in the earlier step.
Step #7: Parallels will ask for your device usage preference to optimize it. You need to choose from either gaming or productivity.
Step #8: Next, you’ll need to specify a location on your storage that will be used by Parallels to emulate Windows.
Step #9: Press on ‘Create’ to get the virtual environment set up.
Step #10: After this process, you’ll need to select the number of cores and the amount of RAM you want to reserve for running Windows alongside macOS. The recommended settings are at least 4 cores and 8 GB of RAM.
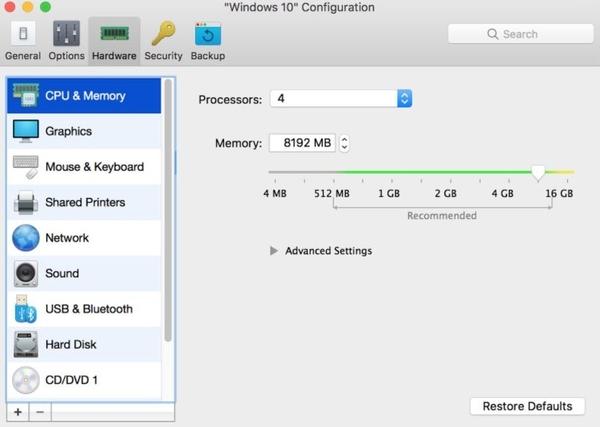
Step #11: You will need to grant a few more permissions to be able to access hardware features like webcam, microphone, Bluetooth, etc.
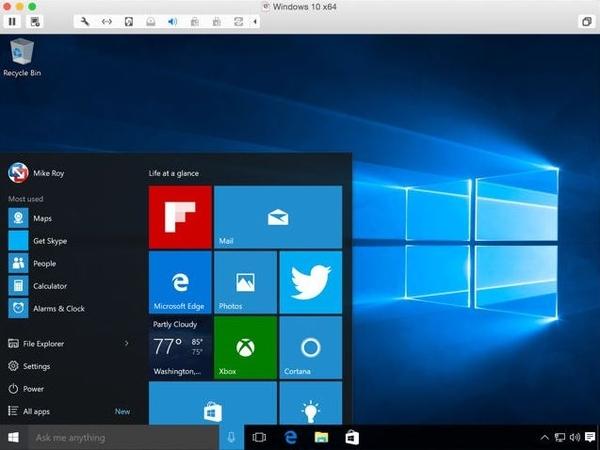
Step #12: You now have a functional Windows installation running simultaneously with macOS. You can switch between the two OSs by pressing “Command + Tab” on your keyboard.
Conclusion
Running Windows on your Mac hardware allows you to run games and applications that have been made exclusively for Windows OS. You can even run both macOS and Windows simultaneously using the comprehensive guide listed above. The methods should work for both older Intel-based Macs and newer M1-based Macs.
Recommended Reading:
