Hey there, bride-to-be! Congratulations on your engagement!
Cry your heart out, spend the entire day screaming on the phone with your girlfriends, and chug on champagne like there’s no tomorrow because things will stop being fun pretty soon now. Lie in all your post-engagement glory, because as soon as you wipe those tears of joy from your face, the real work begins.
Planning a wedding with an unlimited budget and a task force of dozens of decorated wedding planners is hard. Planning a wedding on a reasonable budget on your own is downright impossible.
While it might seem like there’s no solution in sight to your wedding related woes, a simple and easy solution is actually just around the corner. Creating a wedding website will make planning, organizing and executing a wedding not only simple and easy but also a fun and enjoyable experience.
We’ve scoured the web back and forth to gather all of the info you’ll need to create a fuss-free, engaging website that will help you get through the incredibly complicated and tiresome ordeal that is organizing a wedding.

Let’s get started.
Contents
- 1.Choose a simple, easy to use platform
- 2.Choose a layout
- 3.Create a timeline of your relationship
- 4.Add an about me page and write a thing or two about your wedding
- 5.Create a beautiful gallery of your engagement photos
- 6.Add the time, date and location
- 7.Got a whole week planned with micro-events? Add a calendar
- 8.Don’t forget the RSVP form
1.Choose a simple, easy to use platform
Building a website from scratch is absolutely out of the question, so the next best thing you can rely on is a website builder. However, just setting up your account can take hours on end if the platform you’re using isn’t intuitive.
Always choose a platform that offers pre-made templates, easy to use features, an intuitive interface, and 24/7 customer service.

SITE123 is an incredible website builder we just can’t get enough of. It enables its users to create amazing websites in no time, thanks to its smooth and uncomplicated setup process. And if you’re worried that a wedding website is too specific of an idea to be executed successfully on such a simple and easy platform – you’re dead wrong. When setting up your website, choose the ”event website”- it’s specifically tailored to fit all of the functional and aesthetic requirements of a wedding website.
2.Choose a layout
Before you start uploading your fresh engagement photos and start updating your registry, spend a minute or two focused on the layout and the overall theme of your website. While it isn’t a mandatory step, it will save you a lot of time and effort later.
Think about what you want to accentuate with your website – your pictures, the RSVP form, your venue location, etc. – and choose a layout accordingly.
3.Create a timeline of your relationship

While most of your wedding guests are probably familiar with your relationship, creating a timeline of your relationship is a fun and easy way to share the important relationship milestones you and your fiance achieved.
SITE123 has a great timeline feature you can easily edit and add as many milestones and events as you want – the day you first met, your first date, your first holiday together.
4.Add an about me page and write a thing or two about your wedding
Use the about me page like a general invitation meant for all of your guests – share your excitement with them, tell them what and when to expect it, a bit about the dress code, the venue, and anything else relevant you can think of.
5.Create a beautiful gallery of your engagement photos

If you were lucky enough to have someone snap a few pictures of your engagement, share your post-engagement bliss with your guests by uploading those photos to a gallery.
Throw in a few photos of the two of you together to create a well rounded, visual timeline of your relationship.
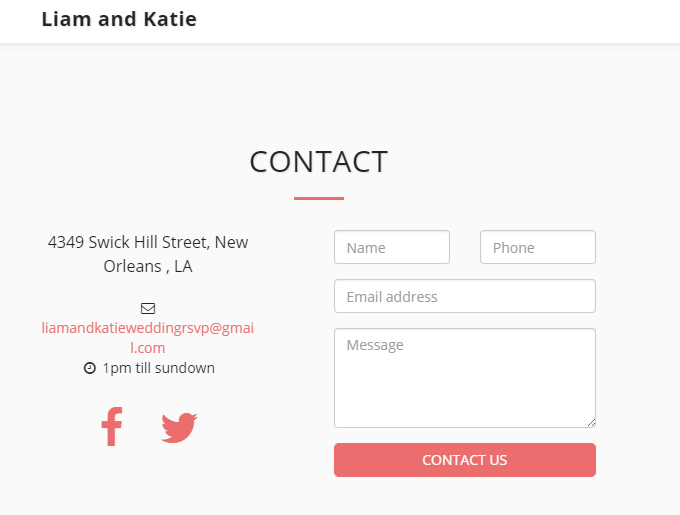
6.Add the time, date and location
Make the same old, two-line venue address less dull by adding a map to your website. SITE123 offers perfect integration with Google Maps, which makes it easier for your guests to find their way around when the big day comes.

As every SITE123 website is mobile optimized, your guests could use it as a fuss free navigation service, avoiding the frustration of having to ask or call for directions.
7.Got a whole week planned with micro-events? Add a calendar
Keep the bachelor and bachelorette parties, rehearsal dinners and brunches in order by adding a calendar to your website. SITE123 offers seamless integration with Tockify, the simplest, easiest to use, most intuitive online calendar out there.
Just add it to your website from the App Market and start adding everything you’ve got in plan for your guests. You’ll keep everything and everyone organized, and it also works on mobile, which is an added plus.
8.Don’t forget the RSVP form
Organizing a wedding is hard, especially if you don’t know how many people will show up.
Create a RSVP form so you can keep track of who’s coming and who’s bailed out on your big day. It will keep your costs low and your big day free of unpleasant surprises.
There are a few different ways you can do this. You could add the generic contact form that comes with your SITE123 website. It’s the easiest way with the least amount of effort needed, but if you have a large guest list, keeping track of everyone will be difficult. You can add a custom contact form using JotForm or 123ContactForm. Both are free to use with SITE123, and both allow you to create custom RSVP forms that will make keeping track of your guest list a breeze.
Conclusion
These 7 easy steps won’t take more than hour to complete and will leave you with a beautiful, innovative and useful way to share your wedding with your friends and family. Not a bad way to spend a lunch break, right?
If you’ve got a few extra minutes to spare, you can put a bit more effort into the look and the design of your website. Play with the fonts, the color scheme, the menu and navigation bars. Here’s a great article with a few tips on how to achieve that professional look without any special skills or investing too much time.