WiFi Not Working in iOS 9 on iPhone and iPad
Numbers of iPhone and iPad device user are complaining that WiFi not working in iOS 9 device. Here solution that solve your WiFi problem.
As we already know that iOS 9 comes with tonnes of features and lots of improvement. But the new iOS update also has many problems like Airdrop not working, slow performance, Non-functioning of iMessage, iOS 9 getting freeze at “Slide to Upgrade” Screen. These issues are annoying almost all the iDevice Owners.
Nowadays, many people are facing the Wi-Fi Connectivity issues on their iPhones and iPads. This issue is being reported that wifi not connecting, connection dropping, slow internet speed or showing incorrect password prompt. Also check WiFi Channel Scanner Apps for iPhone.
The Apple team has not come with an official solution so far, but we have checked some of the possible troubleshooting tips to fix WiFi not working issue.
WiFi Not Working on iPhone and iPad in iOS 9: Solutions
Wondering why is my wifi not working? Read the best and working solutions below:
Step #1 : Force Restart
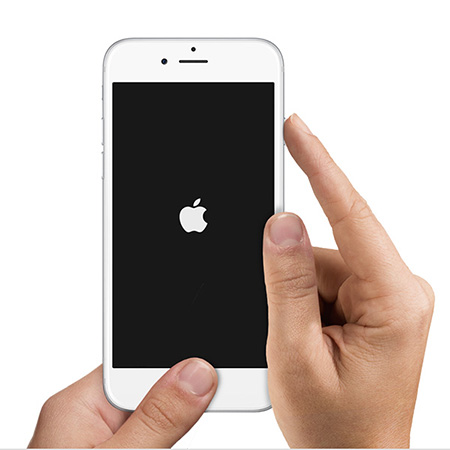
We know that most you guys have already tried this method, but many people are new to iOS Platform, and they might not be sure how to force restart the device. Let me clear one thing that force restarting the device will not harm your iPhone of iPad. To force restart, Hold the home button and Sleep button until you see a black screen and apple logo. This process will take around 10 seconds.
Step #2: Forget the network and reconnect
If you are facing issues in connecting to the wifi network and an incorrect password prompt is showing u then just tap on forget the network and try to reconnect it again. Follow the steps to forget the network: go to settings, then tap on Wifi, then tap on the forget network option, you will get an alert asking you to confirm the action. Tap on Forget the option to forget the network.
Now again go to settings then tap on Wifi, now select the same network that you just forget, Enter the password and check if it is working or not.
Step #3: Disable your Wifi Networking Services
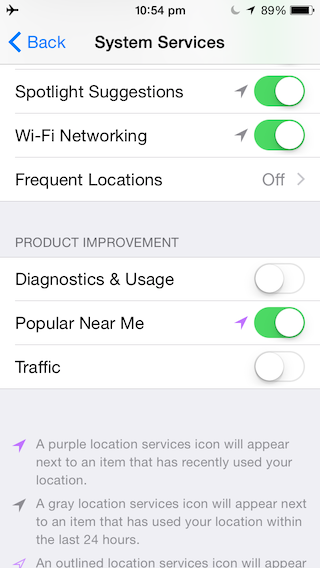
We users solved wifi not connecting issue by applying this method. To disable your Wifi Networking service goes to settings, and then tap on Privacy, then tap on Location service. This action will not disable your network entirely but will stop the wifi networking location.
Step #4: Reset your Network Settings
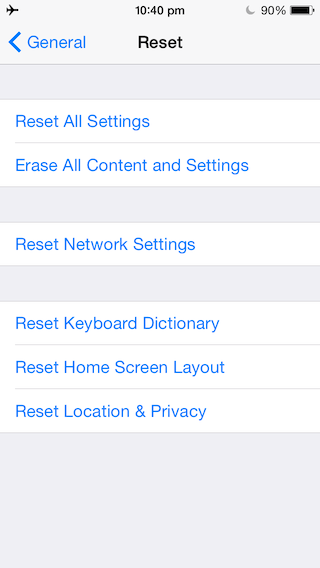
Use this method if the wifi not working on iPhone because many people have solved the issue by following this process. Resetting the network issues will clear all the caches and DHCP settings as well the other information related to the network. Here are the steps to reset your network settings. Go to Settings, then navigate to General settings then press on reset network settings. That’s it.
Step 5: Custom DNS Settings
If any of the above methods is not working for you, you can set the custom DNS settings on your device. You just need to switch to openDNS or GoogleDNS. Follow the steps to set custom DNS. Follow the steps,
- Go to Settings, tap on Wifi Menu.
- Now select the network which you want to use. And tap on the “i” option.
- Scroll Down to see the DNS settings section, tap on the numbers on the right.
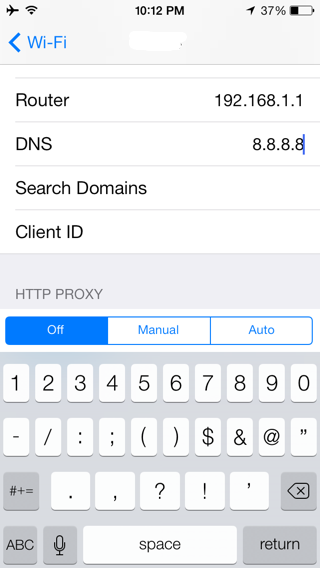
Enter the DNS as listed below
Google DNS : (Use any one of these in the DNS Field)
8.8.8.8
8.8.4.4
And OpenDNS (Use any one of these in the DNS Field)
208.67.222.222
208.67.222.220
Step #6: Restore your Device
If none of the above methods is helping you, then you need to restore your device via iTunes. This is the last resort. Before restoring the device makes sure you have the latest version of iTunes and you have taken the backup of your important stuff so that you could restore from the backup. Also, disable the Activation lock feature if you have enabled it.
- Connect the device to your system (Computer)
- Connect the device with iTunes.
- Tap on the restore button in the summary tab to restore.
- You will get a prompt message, click on the restore button.
- Once done, your device will restart and you will see a Hello Screen, Now you can restore the data.

Please note that this is a time-consuming process based on the size of your backup.
If you are still facing the issues, please let us know by commenting in the below section, we will surely help you to fix your problem.
Read more iPhone Solutions
How to Bypass iCloud Activation Lock on iPad?
How to free up space on iPhone?
How to set up Two Step Verification for Your Apple ID
