In this article we going to show you how to record iPhone screen in iOS 11. Just follow step by step guide to capturing iPhone and iPad screen in iOS 11.
Contents
How to Record Your iPhone Screen
Apple’s iPhone and iPad are fantastic, they are more authentic, powerful and trusted devices. But many people find it difficult for the first time use, but there are thousands of tutorials in youtube on each function and feature.
In iOS 11 the developers have brought a native screen recording software which is very welcomed by YouTubers, bloggers, developers, etc. But many people still have some difficulty in understanding the software, so in this post, I will guide you through “how to record your phone screen” and mention the features of iPhone screen recorder software.
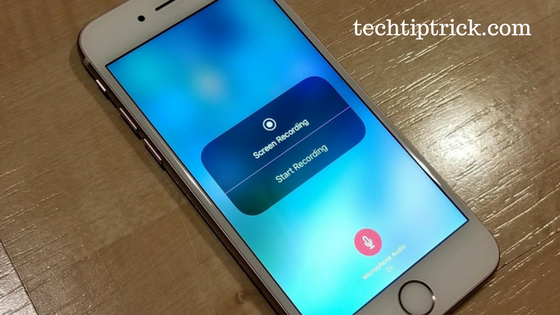
Features of the iOS 11 new screen recording software
- It is a simple and minimalistic software provided by the iOS 11, with all basic functions of a screen recording software.
- You can edit the recorded video in your iOS itself, by using the photos app. Here you can edit, trim, crop and do a lot more things with your video.
- This software also records the games and apps which may third party software fails.
- You can enable a cursor to make your viewers know where you are touching in second of your recorded video.
How to record screen on iPhone or iPad
The iPhone and the iPad both operates on the same operating system iOS, iOS 11 is the latest version of the iOS. Screen Recording is a native option in the iOS 11 Control Center. So you will never have to search in depth settings to sort it. Follow my instructions below carefully.
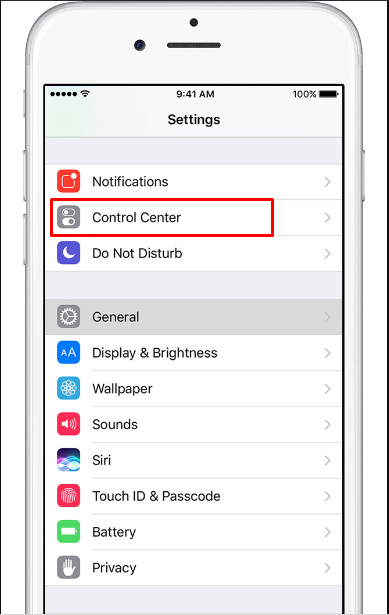
Step #1: Go to settings and then click on Control Center.
Step #2: Now scroll down a bit until you see an option “Screen Recording”.
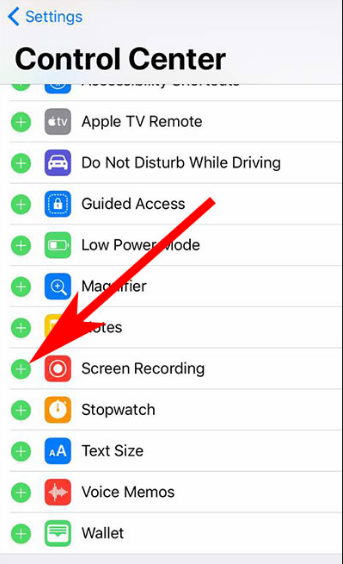
Step #3: Click on the Green Plus Button on the left to option to add it to your control center.
Step #4: Now you can swipe from the bottom of your iPhone or iPad to see the new dot like icon which is the screen recording icon.
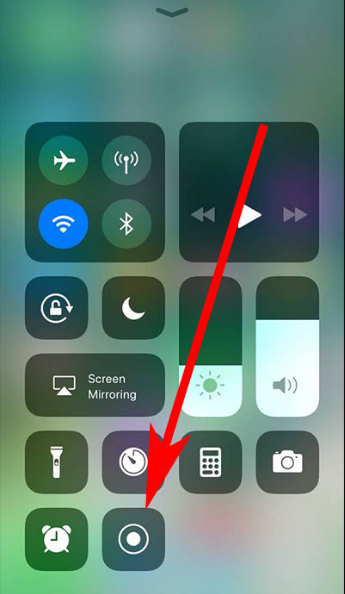
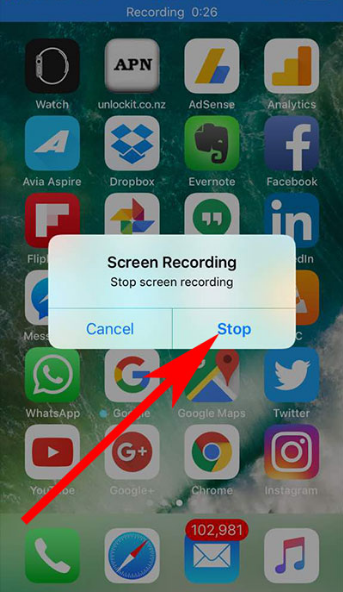
Step #5: Click on it and the function will start recording your screen. To stop it click on the blue bar on the top of your screen and click on stop recording or just swipe from the bottom and click on the same icon from the control center.
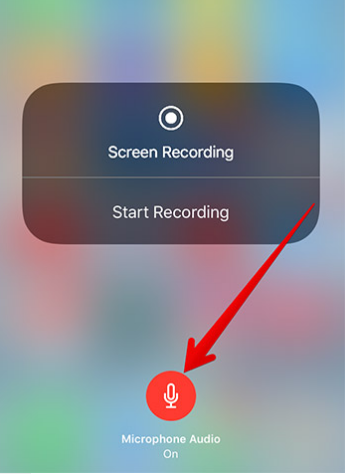
Step #6: To record your screen with sound, press and hold on the screen recording icon and click on the microphone icon. Now go back and click on the same icon to start recording your screen with sound.
Now, then recorded video will be saved in your internal storage, you can view it or edit it in the photos app.
Final words
This is an excellent initiative by the Apple developers, this software will be very useful for YouTubers and bloggers for make tutorials about the function in iPhone, app reviews, etc. But, the features of the software is very limited, it cannot be a replacement for other third party software which comes with wonderful features. Still, this is a better option considering other issues. If you face any issues while recording your iPhone screen then do comment below we will help you out.
Related Post
